How to Add Mailchimp Popup to WordPress
How to Add Mailchimp Integration Pop Ups to WordPress
Elfsight Popup provides a straightforward solution to engage visitors and grow mailing lists. Integrating seamlessly with Mailchimp, this widget enhances any website by enabling customizable, targeted popups designed to convert visitors into subscribers or customers.
This no-code, versatile plugin not only simplifies the creation of popups but ensures that they are effective and attractive. Whether you’re aiming to promote special offers, collect feedback, or prevent cart abandonment, Elfsight Popup makes it easy to configure the right messages for the right audience.
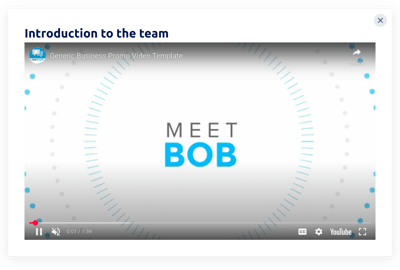
See how simple it is to add a Mailchimp Popup to your website using our quick demo:
- Select from a variety of popup templates designed for various campaigns.
- Customize your popup with intuitive design options — no coding needed.
- Connect it to your Mailchimp account to synchronize subscriber data automatically.
- Embed the generated code into your website effortlessly.
And there you have it — a powerful Mailchimp popup integrated into your website in just a few steps. Engaging your audience has never been easier!
Key Features to Remove Hesitations on Adding Plugin
Below is a chart detailing some of the standout features of the Elfsight Popup, including its versatile integration capabilities. Each feature is described to highlight its benefits and functionality in enhancing your website’s user engagement.
| Mailchimp Integration | Seamlessly sync with Mailchimp to capture emails directly from popups’ forms. Ideal for growing your list quickly and efficiently. |
| Customizable Templates | Choose from over 100 templates with interactive forms. Easily customize to fit your brand’s style and needs. Saves time and enhances appearance. |
| Targeted Display Options | Set popups to appear based on user behavior, such as exit intent or time spent on page. Boosts engagement by showing the right message at the right time. |
| Interactive Elements | Include elements like forms, countdown timers, and coupons. Engages users and encourages interaction. |
| Responsive Design | Plugins look great on both desktop and mobile devices. Ensures a smooth user experience across all platforms. |
These features make the plugin a powerful tool for improving website interaction and user engagement through targeted, aesthetically pleasing, and responsive design elements.
Plugin Templates with Mailchimp Integration for Quick Customization
Dive into our extensive collection of ready-made templates integrated with Mailchimp form. Whether you need to boost subscriptions, announce an event, or manage promotions, our templates are crafted to meet a variety of needs. Each template is designed for quick customization, allowing you to add or remove elements easily to match your specific goals.
Take advantage of these pre-configured solutions to save time and effort. You’ll find the perfect template to engage your audience effectively without starting from scratch. Explore, customize, and deploy your popup with just a few clicks!
Explore 100+ Popup templates
How to Make Mailchimp Popup for WordPress?
Let’s see how quickly you can form your Popup with Mailchimp integration. Start with the Mailchimp Popup template in our collection of ready-made widgets.
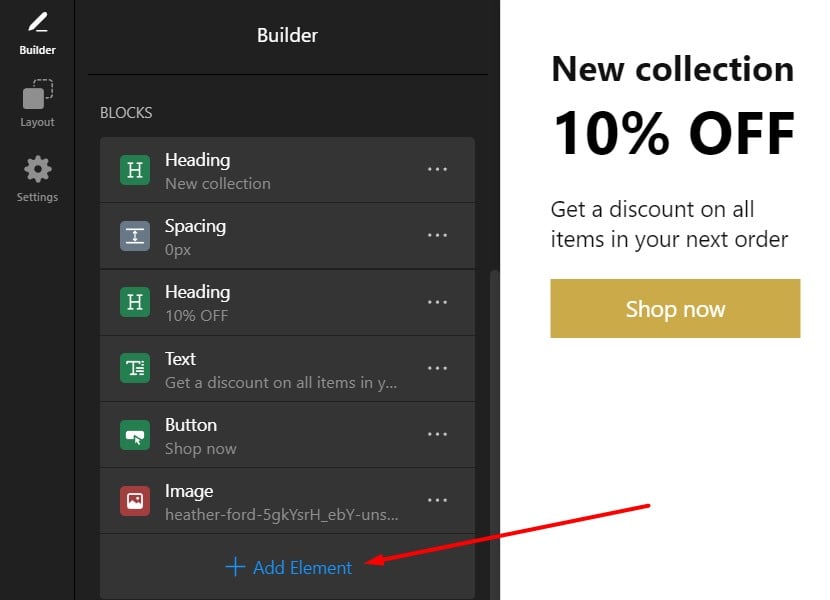
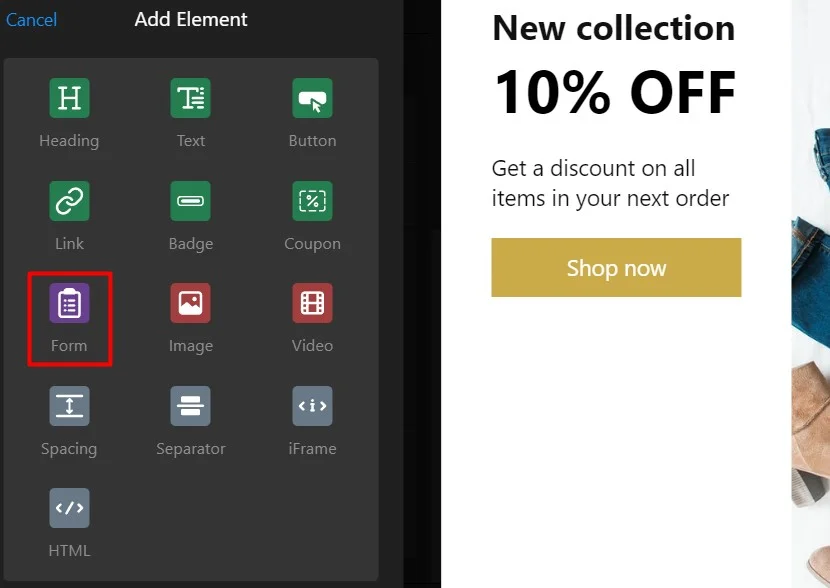
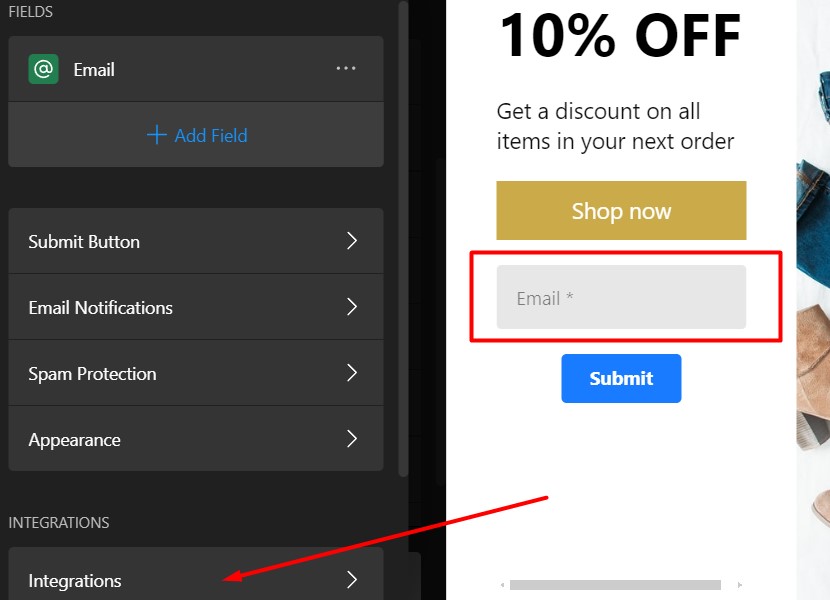
Then find the Form element for your project. Click on it to add it to the template. It will instantly appear on the canvas. You will be able to change the layout of the form and other elements any time in the Layout tab.
Now the Integrations field is what we are looking to connect your Mailchimp with the plugin. Find Mailchimp among the suggested options and start your integration. Afterwards you can finalize your widget and add it to the WordPress website as described in the next section.
How to Add Mailchimp Popup to WordPress: Tutorial
Now that you’re familiar with the basic features and advantages of the Mailchimp Popup, let’s walk through the simple steps to embed this widget into your WordPress website. Our clear tutorials will guide you through every possible method to ensure you can integrate the plugin effortlessly, regardless of your technical skill level.
Adding Mailchimp Popup to a specific page
- Log in to your WordPress website’s backend, click on Appearance and choose Themes.
- Find the theme you need to edit, click on three dots and choose Edit.
- Go to Pages tab and choose the page you want to add the Mailchimp form to. Then click on the template on the right side.
- In the editor, find where you’d like to show the Mailchimp form banner and click on Add Block.
- Then find and click Custom HTML.
- Paste your installation code in the popup window and click Save to save changes.
Adding widget to all pages via Customize option
- Log in to your WordPress website’s backend. Go to the Appearance tab in the left-hand menu and click Customize.
- Choose Widgets in the left-hand menu.
- Click Add a Widget at the bottom of the menu and select Custom HTML in the menu that appears.
- Paste your installation code to the Content field, click Done and press the Publish button to apply changes.
You can also watch the video tutorial on adding a Popup to WordPress websites:
For further assistance or more detailed information about embedding the Mailchimp form into WordPress, feel free to visit our Help Center. Our support team is also available to help with any technical issues or questions about Elfsight products.
Experience Better Immersion with Your Popups
- For additional support, please visit our Help Center where you can find detailed guides, tutorials, and direct assistance from our dedicated team.
- Also, consider joining our Community to engage in discussions about widgets, updates, and various use cases.
- We’re always keen to hear your innovative ideas for enhancements, so please feel free to add them to our Wishlist.
Thank you for choosing Elfsight’s Popup with form integrations for your website needs! We hope this guide has been helpful. If you have any further questions or require assistance, don’t hesitate to reach out. We’re here to help make your experience as smooth and efficient as possible.

